Tea Caddy Design Critique
I’ll admit it. I’m not much of a designer. I like simple stuff and usually I’m able to find a Queen Anne or Shaker piece that is just the chest, chair, or table I’m looking for. Of course I add my own embellishments but most of the time that is driven by a functional need like adding a drawer or changing dimensions. Aesthetically I will add a bead here and there, inlay something, or change the moulding profile (easy when you have hollows and rounds). I don’t really consider this to be design. It’s more like embellishment. There is just so much incredible work that has come before me that I haven’t been pushed to create something new. The design gurus out there probably will scoff and cite my case as the reason for the death of new ideas and stagnation of the furniture industry. Oh well, I’ll just add this to the long list of things that are wrong with me.
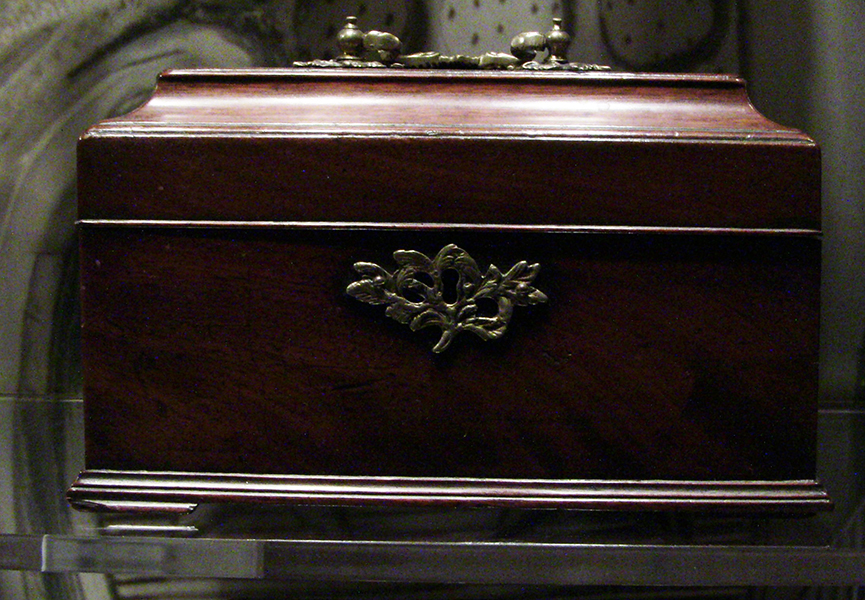
18th Century Original Tea Caddy
However, building projects that are inspired by or “lightly” reproduced from an existing piece has one nice advantage. Those original pieces make a great measuring stick. Recently I visited the Dewitt Wallace Museum in Williamsburg, VA and got up close with one of my inspirations. This Queen Anne Tea Caddy is the original of one I built as a Hand Tool School project last year. I took my measurements and construction cues from a photograph in “Southern Furniture 1680 1830, The Colonial Williamsburg Collection“. I had to make some guesses on size and construction and I’m not sure if the original has a secret compartment. I added one to mine because it sounded like fun. So when I saw the caddy again, this time in person, it was a great opportunity to step back and honestly assess how I did. Shown is a picture I took during my visit to the museum.
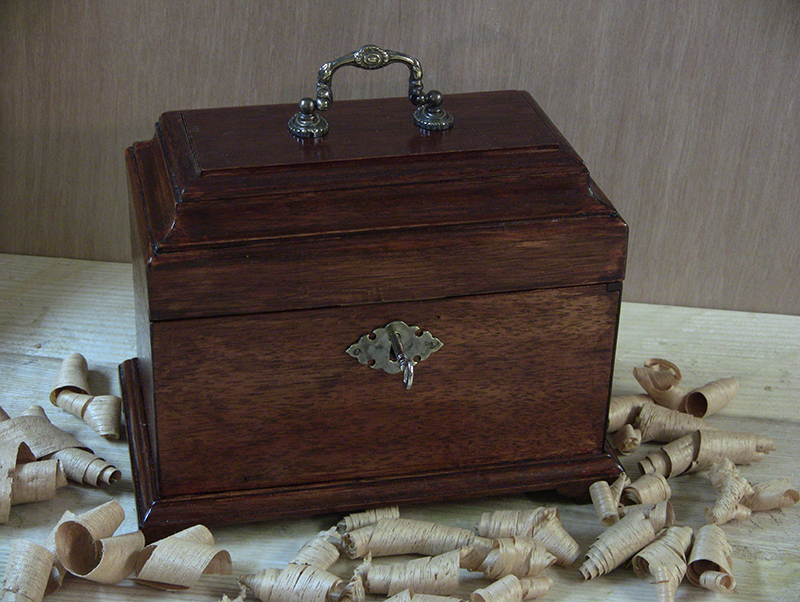
My version of the same Tea Caddy
Both pieces were built entirely by hand in Mahogany. I took some poetic license with the moulding profiles and used plain, straight grained Mahogany instead of the more interesting grain of the original. A lot of these original caddies were actually veneered so it is possible this is a veneer covering.
So what can I learn from this “reproduction”. Woodworking wise, I’m pretty proud of myself for executing a close copy entirely by hand. I’m not happy with the tiny bit of end grain visible on the right corner that gives away the secret compartment and should have utilized a miter joint when I made that sliding panel. That would have matched with the rest of the mitered corners.
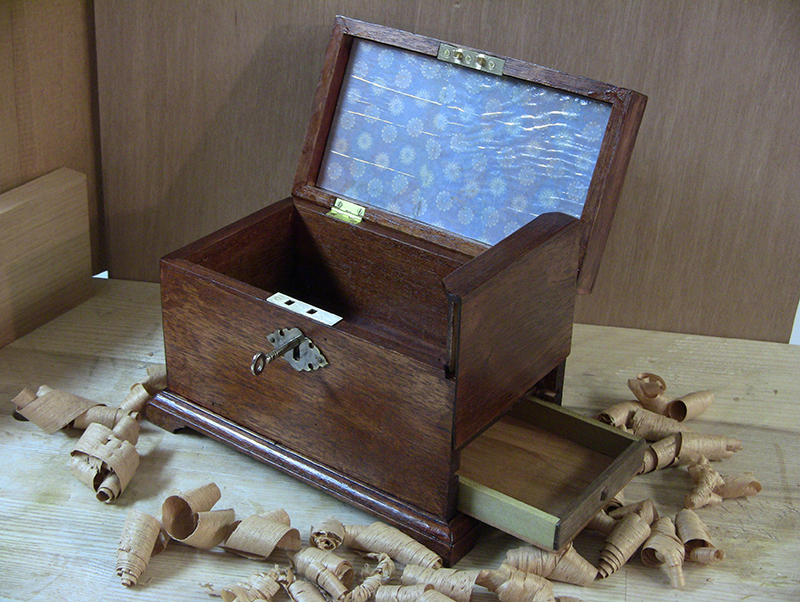
My hardware choices were rather generic but I’m pretty happy with the handle and escutcheon I bought from Horton Brasses. I could have made an attempt to find some Mahogany with more figure, but I was hoping to stick with a more common look. In hindsight, I think I could have done a better job on stock selection. My decision to add a rice paper liner to the lid was driven by some research I did on the originals. I like the look but should have taken more care after gluing to make sure the paper didn’t wrinkle. I would like to hear from any of you if you know a good way to prevent this from happening. I used hide glue so I’m sure the water base has something to do with the wrinkling.
 I think I missed on the proportions a bit and made the lid moulding a bit too tall for the rest of the box giving it a top heavy appearance. I think I tried for too much there and should have gone with a less is more approach. Ironically, I think I missed an opportunity by not adding the bead profile to the bottom of the lide. Side by side comparison really shows me what an impact that little bead has on the overall look. Not sure why I omitted that. On the converse I like my treatment for the base moulding. The simple ovolo and bracket foot looks nice while I feel the original is too cramped. The original would have been a more complex moulding to make but I don’t think the skill required to make it is much different from my treatment so I’ll call that a wash.
The most glaring thing that bothers me is the finish. My dye job to prematurely age the Mahogany is muddy and I didn’t make any attempt to fill the pores for a glassy finish. Like most woodworkers, I tend to rush the finish after hours of woodworking and the result is obvious. I think this is the biggest lesson to learn from this comparison and something I need to really take to heart in my future builds.
In the end, being able to hold my work right up against the original is very instructive. My original intention wasn’t to exactly reproduce the 18th century model, but I think I was able to capture the feel of the piece and that makes me happy.
Your Turn
What do you think? Did I get the look and feel right of this piece? What could I have done better and what should I work on for my next piece? Seriously, don’t pull any punches, I would like some honest feedback.
