Joining the Joinery Bench
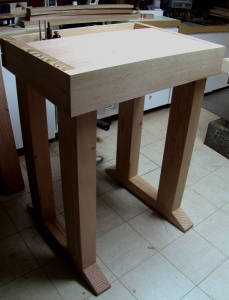 I decided more than a month ago that the Joinery Bench I am building specifically to take to WIA would be a prototype. As I am drawing to the end of the build, I will amend that statement and call it a quasi-prototype. I really like how it is coming together and I only have the slightest concern about the trestle and the resulting stability from it. I’ll be honest, I have never built a trestle anything and that was one of the reasons I added this element to my design. I like having more open space under the bench and the trestle will make a great place for hanging clamps. However because the bench is quite tall I worry about racking forces. So while it is solid now, I am really looking forward to having 1000 or so people tramp through my booth and poke and prod the bench to see how it stands up to the abuse.
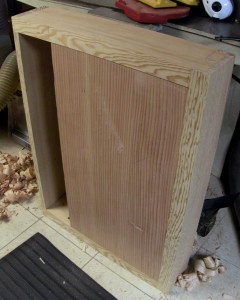 Since my last post on the Joinery Bench I focused on well…the joinery. The top is banded by an apron that serves two purposes. First it backs up the front twin screw vise with a solid clamping surface. Second the apron creates a border to capture the legs and securely register the top on them. Since the bench is designed to be knocked down I wanted a very secure connection between legs and top. All the parts in the top are quartersawn Douglas Fir so I shouldn’t see much movement, but I did not glue the aprons in place. They are dry fit onto a breadboard style tenon on each end. The front apron is glued in place since this is a long grain connection. The tool well in the back will allow for a great deal of seasonal expansion and the well bottom floats and can be popped out if additional clamping is needed at the back of the bench top.
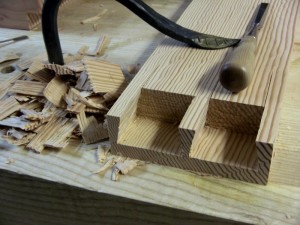 Cutting dovetails in massive stock like this is a nice change of pace from tiny drawer dovetails but the larger surface area means that a straight and square cut is all the more important. A tiny deviation from your line equals a lot of paring later. I joined the back of the apron with through dovetails and half blinds at the front. These joints work in tandem to hold the apron securely to the top.
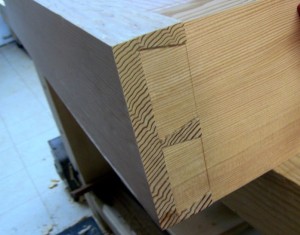 Careful layout and accurate sawing means even tails this big can come together smoothly right off the saw. Despite Douglas Fir being a softwood, the very hard late growth bands do not compress so there is no “bang it together” fudge factor here. I specifically made my front apron long so I could trim the pins flush once everything is glued up.
Next it was on to the legs. If you want to improve your tenon sawing skills, working with big timbers is a great way to go. Tracking your layout lines across a 6″ width and 4″ depth 35-40 times will hone your skills very nicely. My 18″ Bad Axe Tenon saw was the MVP of this show as it cut quickly and accurately. I only did some slight chamfering of the end of the tenon to allow glue squeeze out room to fit these. It goes to show that careful layout and accurate sawing can make hand work very fast.
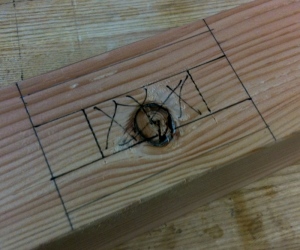 Mortising on the other hand is a different story. With massive mortises, there was no question that I would be boring away the majority of the waste first, then chiseling out the corners. My 12″ brace turned the 1.5″ auger bit nicely and the boring went very fast. Chopping was definitely slow as those same late growth bands are brutal and will dull your chisel quickly. Murphy’s law came into play here as no matter how carefully you plan your stock, a knot always seems to find it’s way into a critical area. No problem, sharpen your auger bit, take a deep breath, and your brace will cut through it.
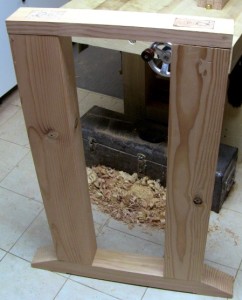 The legs fit into skid feet and the tops fit into through mortises into a stretcher that will provide the reference surface for the top to sit on. Midway between these elements is a stretcher that will house the through mortise for the trestle which will receive a peg to draw it tight. Cutting the bevels on the skid feet and planing them smooth was fun. Anytime I plane a bevel with the grain it amazes me how polished the surface gets. There is something special about that transition from face grain to end grain that a bevel exposes. I made some relief cuts then scrub planed a hollow on the bottom of the skid to make 4 feet instead of 2 long ones that would be prone to rocking on an uneven floor.
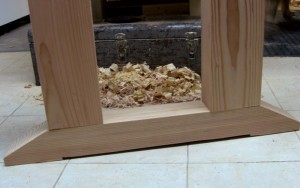 I still have some tweaking and finishing bits to take care of like breaking all the sharp edges, maybe a decorative chamfer here and there and some elements of the Moxon front vise to finish, but for the most part the bench is ready to go. I won’t drill any dog holes in the top just yet. I want to work on the bench and see what kind of work holding I will need. This bench is designed for very specific actions of which dovetailing and tenoning are the principals. Surface work holding is not as important and most of it can be accomplished with a bench hook. I will need a few holes for holdfasts but until I work through a few tasks first I’m not ready to commit to place the holes. I may consider putting some holes in the vise chop and two rows on the bench top to pinch work but I’m not sure yet. Again these are all the things that only working on the bench will answer.
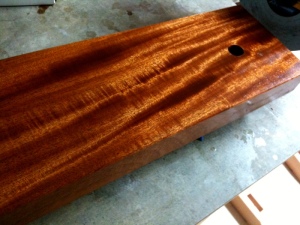
Speaking of the top. Remember the piece of Mahogany I considered using for the slab top for this bench. I took a smaller piece from the same board and put it to use for the vise chop. This piece in the rough looked pretty sad as it had weathered and grayed significantly. Some milling, smooth planing, a coat of oil and this joinery bench now have some bling on the front of it. Normally I’m not a person that puts finish on a workbench but this chop demands to be seen.
I’ll report more on the bench from WIA and after as I begin to make some stuff on it. Stay tuned!


