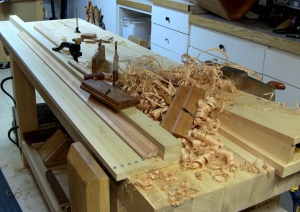
You Don’t Need A Lot of Moulding Planes
 I sold all of my routers earlier this year. I don’t miss them. The truth is, it was more than a year since I had even used any of them before I sold them. My saws, chisels, and planes haven’t missed a step when it comes to making joinery that my router used to make. I rarely used my router for edge treatments like mouldings when I had it despite the fact that I had a decent collection of edge profiles. The irony is that nowadays I actually employ more mouldings with even greater complexity in my projects using moulding planes than when I only had to pop a bit in the collet and run the board across the router table. The thing is, I never liked the “canned” appearance of router bit profiles. They never seemed to fit the project I had built. Now with my hollows and rounds, I have an infinitely adjustable profile bit that allows me to create truly custom mouldings.
Once you understand how to stick your own mouldings using hollows and rounds, you are only limited by your imagination when it comes to the profiles you create. And if that is really an obstacle then just look around to find ideas. Furniture, buildings, picture frames, nature all are brimming with great lines and shapes that you can integrate into your furniture. The problem is that with so many possible profiles I think the myth is that one needs at least a half set of hollows and rounds to be able to even think about sticking your own mouldings. A full set would probably be better.
But here is the real beauty of the situation. I rarely use more than a couple hollows and rounds.
My pair of 6’s and 8’s cover just about any moulding I can dream up for my projects. Granted I am not building large cornice mouldings with wide coves, but I’m also not just chamfering or rounding over my edges and calling it a day. These days you will find plenty of ogees, fillets, astragals, quirk beads, thumbnails, and ovolos in my work but I still rely on mainly a few sizes of planes. Occasionally I get fancy and employ a complex moulding plane in the form of my 1/8 and 1/4″ beading planes, but everything else is done with a hollow and round.
The key is understanding the space you have to play in and breaking it up into elements that your set of tools can accommodate. In fact when laying out the profiles on my actual project piece, I use my planes to trace the profiles. There are much more accurate and exacting methods for laying out the profile using rulers, dividers, and circle templates and these are really necessary if you are trying to reproduce exactly a moulding. The thing is, I rarely reproduce anything. I would rather put my own spin on it and make it truly my own. So how much space do you have to work with?
- Start by marking out the outer extents of the moulding. How much flat do I want at the top and bottom, if any?
- These start and stop points will determine your slope; use a ruler to connect the dots and draw in the slope
- Measure that line to see how much space you have to play with.
So if I have a 3/4″ space to play in, then I can use my #6 set to put 2, 3/8″ wide elements into the moulding. Or I could alter the arc from 60 degrees to 90 and add in flanking fillets around the cover or bead. If I have more or less space, I can alter the pitch of the hollow or round to fill in or take up the extra space. When in doubt, add a fillet to punctuate the moulding and “fudge” that extra space. Of course adding too many elements can look a little busy and the proportions can be thrown off, but you will be surprised just how much you can do with one set of hollows and rounds. Add another set or two and you will be hard pressed to need another size.
So give your local plane maker a call or visit an antique store. These moulding planes are very common and don’t require much effort to restore them to working order. Just a single set will do and you’re off to the races.
Want to learn more about hand cutting mouldings?
Check out Matt Bickford’s blog and order his new book, Matt makes outstanding moulding planes too.
Register for Semester 2 of The Hand Tool School and learn the process as well as how to restore vintage moulding planes


