You Can’t Be a Woodworker without Wood
 Woodworking is more than putting tool to wood. You HAVE to understand the properties of that wood. Don’t focus on how to cut that joint but think about how the wood will react when you put the chisel or plane or router bit to it. How will this particular species differ from the one you just cut. What kind of cut should I make or should I cut it at all? In fact if you want to be a better woodworker, don’t worry about the tools and spend more time trying to understand how your wood is put together.
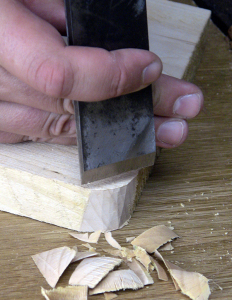
Some of the best woodworkers I know are good carvers. This is because carving is entirely about the grain…at a micro level. Every pass of the gouge is tailored to the wood’s structure within that square inch. Each pass is calculated and assessed to consider how the tool is cutting and how that jives with the wood grain. Will a direct approach work or do I need to skew the chisel while twisting at a high angle? Move over an inch and begin this process again.
To some extent the slower pace of carving contributes to this as I do believe that speed and brute force can disguise difficult grain. Think of a router bit spinning at 10,000 rpm that will cut a rabbet against the grain (not totally safe but justified in some instances) Think of that difficult figured grain board that your hand plane is struggling with and how that powered planer just flattens with ease without tear out (maybe). Perhaps it is this element that has caused many of us to lose touch with our material of choice. When you can fire up a machine and shape wood with little regard for it’s structure you think about it less and less.
This is not a hand tool vs power tool debate, so don’t go there. Rather I think it is an opportunity to improve our skills by paying more attention to understanding the perfectly imperfect and unpredictable building material: wood.
The Hardness of Wood
“Wow that is some hard stuff, it won’t work well with hand tools.”
“That wood will tear up your blades because it is so hard”
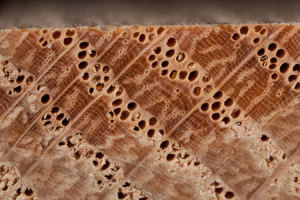
Relatively speaking wood isn’t that hard. When you compare it to the steel that our tools are made from it really is no contest. Yet try chopping a mortise (or routing one) in Walnut then again in Hard Maple and you will question that fact. At the risk of grossly oversimplifying the issue, hardness mostly comes down to density. The less dense boards don’t push back quite so much because they have empty space in their own structure to flex into. So when you drive that chisel into the Walnut board the fibers deform and bend into the gaps between cells and between annual rings. Maple doesn’t have any place to deform into so it pushes back a lot more and the same chisel with the same force drives into the wood much less. Think about chopping a mortise and how with each subsequent pass over it the chisel will drive in a little deeper. This is because we are creating space for the deformed fibers to move into. Looking at it another way, the empty space we create with this relief area guides the wood into a path of least resistance.
Try chopping along the baseline of a dovetail. Put the chisel right in the knife line and the chisel will move past your line and into the keep part of the joint. Saw out the waste or create a little relief notch in the waste area and now you can drop the chisel into the knife line and wood chooses the path of least resistance. Instead of pushing back on the chisel and driving the wedge into the keep part, it cuts away into space leaving your chisel right where you put it. It is a balance of the forces and the “hardness” of the wood will determine where that balance should be struck. eg: You can chop out a bigger piece in Walnut than you can in Maple before the wood pushes back and moves your chisel.
Of course this hardness door swings both ways and when you go into really “soft” woods the fibers can crumble away unless you have a really sharp tool. You can stack things in your favor as the tool starts to dull by actually taking a bigger bit and using the extra bulk of the waste to bolster the crumbling wood. Then again, it is just easier to go sharpen your tool.
Grain direction and planes of weakness
“With the pith up, plane to the points.”
“Pet the cat with the grain or lose your hand.”
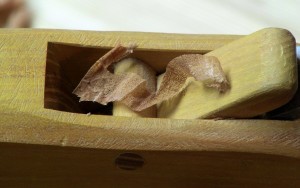
We all know that working with the grain is the only way to plane a board right? That is just fine when you have the perfect board with straight grain that all flows nicely in the same direction. Those are hard to find because plane making companies always buy them up quickly to use at trade shows 😉 In reality our wood is crazy stuff. Just because a board isn’t figured doesn’t mean it is perfectly straight grained. The woodworker needs to be hyper aware of how the grain flows through their boards. Where does it change and why? It is the later part that can tell you volumes about the board you are working. When the grain swirls and jogs off to the left we owe it to ourselves to look closely at that point and try to imagine what was happening when the tree grew that way. Is this grain detouring around a branch or a foreign body? What will I find as I plane deeper into the wood? In these situations you can sometimes determine if further planing will worsen the grain or clear it up.
With a better understanding we can exploit the planes of weakness to get not only a tear out free board, but a stronger one. And this is really what it is all about, reading the grain to find the points of weakness and applying our tools appropriately. Working with the grain exploits the overlapping cones of annual growth and peels them away cleanly. When the grain detours or figure enters the equation, that plane of grain becomes interrupted. You can change directions and plane back over the imperfection or you can work across the grain and sever the fibers to either side of the imperfection and peel away the tough spot in between. In fact I find that the only sure fire way to plane a board is to plane across the grain. Now if only finding that cross grain direction was predictable…
When to Cut and When to Split
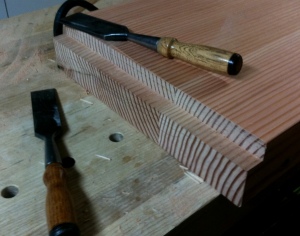
Sometimes we need to look at the task we are trying to accomplish and determine what it is we really need to do to our boards. All woodworking tools really can be boiled down into two things: wedges and edges. One cuts and the other splits. Sometimes they can do both. We need to know what our tool wants to do and how this will effect the wood.Chisels are a good example as we think of them as cutting tools but they are essentially a sharpened edge bolstered by a wedge. The more you drive it into the wood the more it wedges than cuts. Reading the grain and exploiting the weakness means that we can use wedging to our advantage to make our work easier. Splitting can also be dangerous and run unchecked. Once again understanding the structure of the wood and creating stop cuts or judicious relief cuts can guide the split.
I personally believe this is an area of biggest gain. Before you apply any tool to the wood, ask yourself am I cutting or wedging? How is the wood going to react to either of those forces? How can I take advantage of and control that reaction? Of course all of this happens in fractions of a second in an internal monologue but the key is that we are having that internal discussion. Wood has structure. It is not a composite, engineering material that is perfectly homogenous. We have to treat it as such and analyze every cut (or split) we make.
We will all identify species that we like to work with but the key is figuring out why you like working with it. In the end don’t get too caught up on species because every board is unique and you can’t assume that just because you had luck in the past that you will again. Remember, unfigured does not mean straight grain. Clear does not mean switch off your brain.
Overall, I think this process of close scrutiny will bring you closer to the material we love and help you understand it better. Eventually all of this decision making will happen automatically but you will win a deep respect and love for the wood we work. Its not about the tools we use, but how we apply them to the wood we love.


