Google Analytics Alternative

A Better Way to Flatten a Board by Hand

Forget the Process and Treat Each Board as Unique

I’m hesitant to even call this a technique or a method because it is the total absence of process that makes this milling approach so effective. In short, every board is unique so doing the same thing to flatten every board is folly.

Here is the Secret

Diagnose the high spots and remove only the high spots…then and only then do you start taking full length passes. There is no need to work across the grain or diagonally, only with the grain.

To add on to this, you want to spend more time checking the board with a straightedge than you do actually planing. Assume that every stroke you take with the plane is throwing it out of flat and so you need to check with the straightedge often so you aren’t creating a shape that will require even more planing to fix. The net result of all of this is a flat board with very little time spend planing and VERY little actual wood removed. So your 4/4 rough board is now 15/16 thick or you are making rip cuts right on the line and flattening and squaring the edge while removing only 1/32″ of wood.

This changes the game and makes milling a board by hand not a trial or hard work, but a quick and simple task that teaches you a lot about how that board will behave in all the subsequent steps.

New Lessons From The Hand Tool School Vault

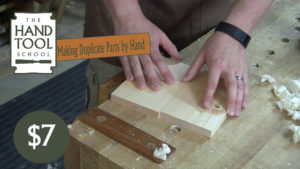
  • If you have ever wondered or struggled with creating parallel edges or duplicate sized parts by hand then this 20 minute lesson may be just the trick to get you making your parts identical with a hand plane.
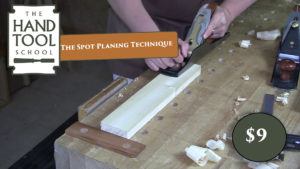
  • For a more in depth look of the Spot Planing Technique and instruction on how to build the planing stop I used in this live broadcast, check out my lesson on the same topic.

Leave a Comment:

All fields with “*” are required

Stanley Powers

Don’t understand why you use a straight edge to check flatness. You still could have twist in the board which would only be revealed by using winding sticks. The simplest method (and quickest) is to flip the board and check the planed surface against the flat bench top. Flip back and mark high spots for further planing.

    Shannon

    Couldn’t agree more but if you watch again you will hear me say that for demonstration purposes it is easier to show with a straightedge. But you will also see me flip the boards over when I feel I have reached flat to test on the bench. At the same time be cautious of using the bench too when you first start planing as you can precisely see where the high spots are whereas a straightedge or the plane sole can show you exactly where the bumps are.

Joe laviolette

Thanks for this Shannon. I just got done flattening a large-ish maple table top. A task I was not looking forward to so I kind of applied the same principle. I knew I wasn’t in wind so I just kind of ran my hands over the piece and felt for high spots and then dealt with those. After I was done full length/width shavings from my finely set smoother confirmed my hands were a pretty good judge of high’low spots.
I grabbed the full length video from the Hand Tool School. It’s really good. I’m going to start applying that to my “process” – and take the Veritas scrub plane off my Christmas list. Also I feel like a huge dumbass after seeing how you aligned the holes for the planing stop. I make a lot of those and it just got a lot easier.

    Shannon

    I appreciate your purchase Joe and I’m glad that I could provide the lightbulb moment for you on that planing stop creation.