Hammer Veneering 101
Hammer Veneering, Live
I’ve been working on an 18th century mirror lately and had to veneer some great Walnut burl for some fretwork pieces. I was posting about the hammer veneering process on my Instagram account and got a lot of questions about it. I then got a whole bunch of emails about the technique so I figured it would be a good opportunity to fire up the live stream and walk through the process. Its really quite simple, the veneer hammer is used like a squeegee that pushes out any air pockets between the veneer and the substrate thus creating a vacuum where the weight of the atmosphere can do the job of clamp. So there is very little gear needed to pull this off and you have the luxury of being able to precisely place your veneer pieces all the while being able to see what you are working on without clamps or vacuum bags obscuring the view.
Hide Glue
Hammer Veneering just won’t work without hide glue. The hot hide glue stuff, not the liquid. Specifically you need to mix it up using an 11:6 ratio of water to glue in order to get the fast tack and low viscosity that makes the fun and messy squeegee action work. Thanks to Steve Latta for that magic ratio. The times I had tried this before mixing with that ratio went okay but I always had more trouble getting the glue to tack up quickly. That ratio really is a big key to success. But as I said in the video, the ratio doesn’t effect the holding power of the glue, just the application. So if you flub the mixing its not like you will have a glue bond that will fail, you may just have to work the hammer a bit more to get everything to lay down while waiting for the glue to tack up.
Toothing Plane
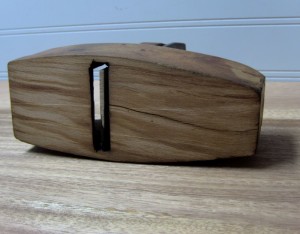
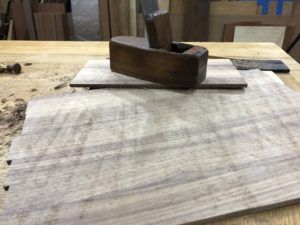
 I demonstrated the use of a toothing plane to prepare the substrate and the veneer. This step is optional and I definitely would not tooth a thin, commercial veneer. I do however find that you get a much stronger glue bond and even an easier time during the hammering process getting everything to stick on place where you want it with that additional texture from the toothing plane. I should be clear that this is NOT the toothing planes that you can buy from Lie Nielsen and Lee Valley. Those blades are for coarser work and toothing a surface before hammer veneering is not about removing a lot of wood at all. The vintage toothing planes have a very fine, saw tooth looking tooth to them and create tiny shavings and remove almost nothing from the thickness of the board. I make 3 passes with the toothing plane: directly across the grain, then diagonally in each direction making a cross hatch pattern on the board. With shop sawn veneer that is 1/16″ or thicker I will tooth the veneer in addition to the substrate.

I urge anyone to give this veneering technique a try, its easy and highly effective without the need for a bunch of additional equipment or even a long drying time. If you have questions about it, just let me know and I’m happy to help.


