Hand Tool Users are Not Immune to Silly Set Ups
Ever since I sold all my power tools I have become hyper aware of which steps are necessary in my day to day work. I look for shortcuts everywhere and have come to realize where time is wasted preparing for a task when just getting to work will finish the job faster than all the planning in the world. Unfortunately this attitude becomes pretty obnoxious quickly as we self title ourselves as “enlightened” woodworkers not tied to test cuts and time wasting jigs. If we can see the line, we can saw the line without pesky angle gauges and setting machines to mirror the gauge. Our jointer planes are of the widest bed variety on the market capable of flattening the widest board with no adjustments and at a fraction of the cost of our powered counterparts. Blah, blah, blah, snooty, snooty, barf!
 So it is good and fitting that hand tool users get some humble pie in the face every once in a while to ground us and remind us that we too waste time on set up and will use specialized tools to accomplish tasks that probably could be done quicker with just a chisel.
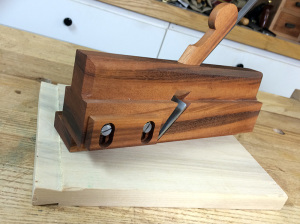
Enter the sliding dovetail plane. It is the definition of sexy tool porn (that’s for you Megan). It’s a thing of beauty full of esoteric mystery capable of producing perfectly dimensioned dovetails across any length of board. It simplifies what can be a daunting joint…
…or does it?
This sliding dovetail plane will create a beautiful and consistent width dovetail in seconds. It will recreate that exact same tail time and again as well. But as we all know one half of a dovetail joint isn’t very useful and unless that tail you created just happens to fit your pin this is all a moot point. Unless you have a plane that creates the pin of the joint and can do it repeatedly then a consistent tail is pretty meaningless. For the record these sliding dovetail pin planes do exist but only in obscure and dusty hand tool cabinets of curiosity. I have used one before and I was horribly unimpressed. My backsaw and chisel did a much better job.
My point is that you will have to tweak the settings of this plane including the fence, depth stop and projection of the blade in order to dial in the perfect shape of dovetail that you need for the specific joint you are making.
The fence has to be carefully set to exactly position the shoulder of the tail where you want it and you must make sure that the fence is parallel too. So you will need to check at multiple locations along the fence to ensure this. Note that you will want to set the project of the blade first because as the cut is set deeper the blade projects away from the fence at an angle. Therefore it is possible to tap the iron once the fence is set and now your dovetail shoulder won’t be in the right place. Next you will want to set the depth stop. This is probably the most important setting as it will determine the eventual thickness of the tail and how tightly or loosely the joint fits together. So the tendency here is to set it a bit high for a snug fit because we all know that you can’t add wood back on after you have planed it away. You can fiddle with the depth stop in the final fitting of the joint to dial it in and get a snug joint right off the plane but you will want to make sure you have the mating pin side cut first.
I need to add that each one of these adjustments are best followed up with a test cut. Sounds a bit like a router table doesn’t it?
Now I don’t think it is any great feat of skill to create consistent dovetail pins with a hand saw and chisel but keep in mind that if you create any variability in the depth, width, and angle of your dovetail pin then your careful settings on the plane will be useless. In other words, you went through a lot of careful adjustment to get the tail fitting perfectly in a pin and the next one you fit was sawn a bit narrower or (yikes!) fatter and now your set up doesn’t’ work anymore and you have further refinement to do or the joint is blown because it is too loose. Suddenly the realization sets in that until you can remove the variables in the pin, perfect set up of the tail plane is useless. Now there are planes that cut the female part of the sliding dovetail but in my experience they do not do a good job and are rarer than a $50 Stanley #1. This is the key element the power tool guys have that makes their meticulous set up and test cut process necessary. The more you try to fix angles and cutting action the more your entire process must be “set” to the same precision.
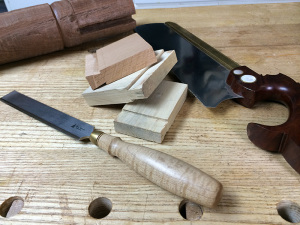
So I usually intentionally set the depth stop so my tails won’t fit and I pare them into a snug fit using a chisel. It makes you wonder why you used the sliding dovetail plane in the first place right? I have cut quite a few sliding tails just by sawing the shoulder and paring in the tail angle with a chisel. Its quite easy actually and super fast because working cross grain you can zip off the wood with a sharp chisel. With the plane this whole process is disturbingly like the scenario in which I criticize the power tool guys when they fiddle and test cut then refine with a chisel or plane to get the perfect tenon fit. I always ask why they didn’t just saw the tenon and fit the tenon right from the saw. I’m starting to feel a bit hypocritical now…
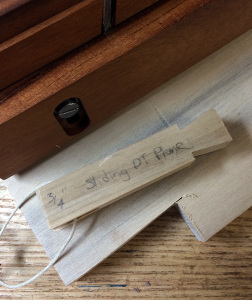
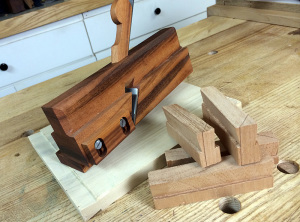
 In fact, once I had set up my dovetail plane to create a perfect tail on a 3/4″ thick board, I created a set up block that would allow me to quickly set it up again in the future. Again this reminds me of when I still have a router table. At least I didn’t make my set up block out of UHMW plastic. I will admit though that with this set up block I can not only set up my plane quickly but I can count on the resulting tail to look just like the set up block. This means I can transfer the set up block’s shape to my pin board and as long as I saw to the lines I will get a great fit. That’s just like cutting regular dovetails.
It sounds like I’m not a big fan of the sliding dovetail plane and that in using it I am altering my working processes back to something similar to when I still was using power tools. The fact is this is a really useful tool when it comes to making a lot of sliding dovetails. Even if you have to refine the fit with a chisel, being able to quickly and repeatedly set the angle and zip out the bulk of the waste in seconds is awesome. Moreover, long sliding dovetails will be much harder to cut with just a chisel and saw as you have to match the tail angle over a much wider distance. This is where the sliding dovetail plane is king. Again it sounds a lot like the argument power tool woodworkers use to shut up the hand toolers. I guess this is my way of saying that the sliding dovetail plane may be the tool that can finally unite the sides and end the stupid Normite vs Neanderthal debate.
It is what it is and I love this plane. I guess this whole article is really a kind of back handed review of Philly Plane’s Sliding Dovetail plane. The craftsmanship as always with Phil is above reproach and the tool just works. It is hand tool geeky and fun to use. It does its job really well and holds it’s settings. But it isn’t always the most efficient way of cutting this joint and so it is also a sign of a woodworker that has all the tools he needs but just can’t help himself when it comes to tool bling. That is part of the fun of woodworking right? Hand tool or power tool it doesn’t matter, we love specialized tools not for their efficiency (unless running miles of sliding dovetails all the same size) but for the coolness factor. So check your hand tool superiority complex at the door as the power tool guys at least can set up a tool and expect both sides of the joint to be the same with every cut.


