How to Cut the Maloof Joint by Hand
A Blind Rabbet and a Tenon Walk into a Bar…
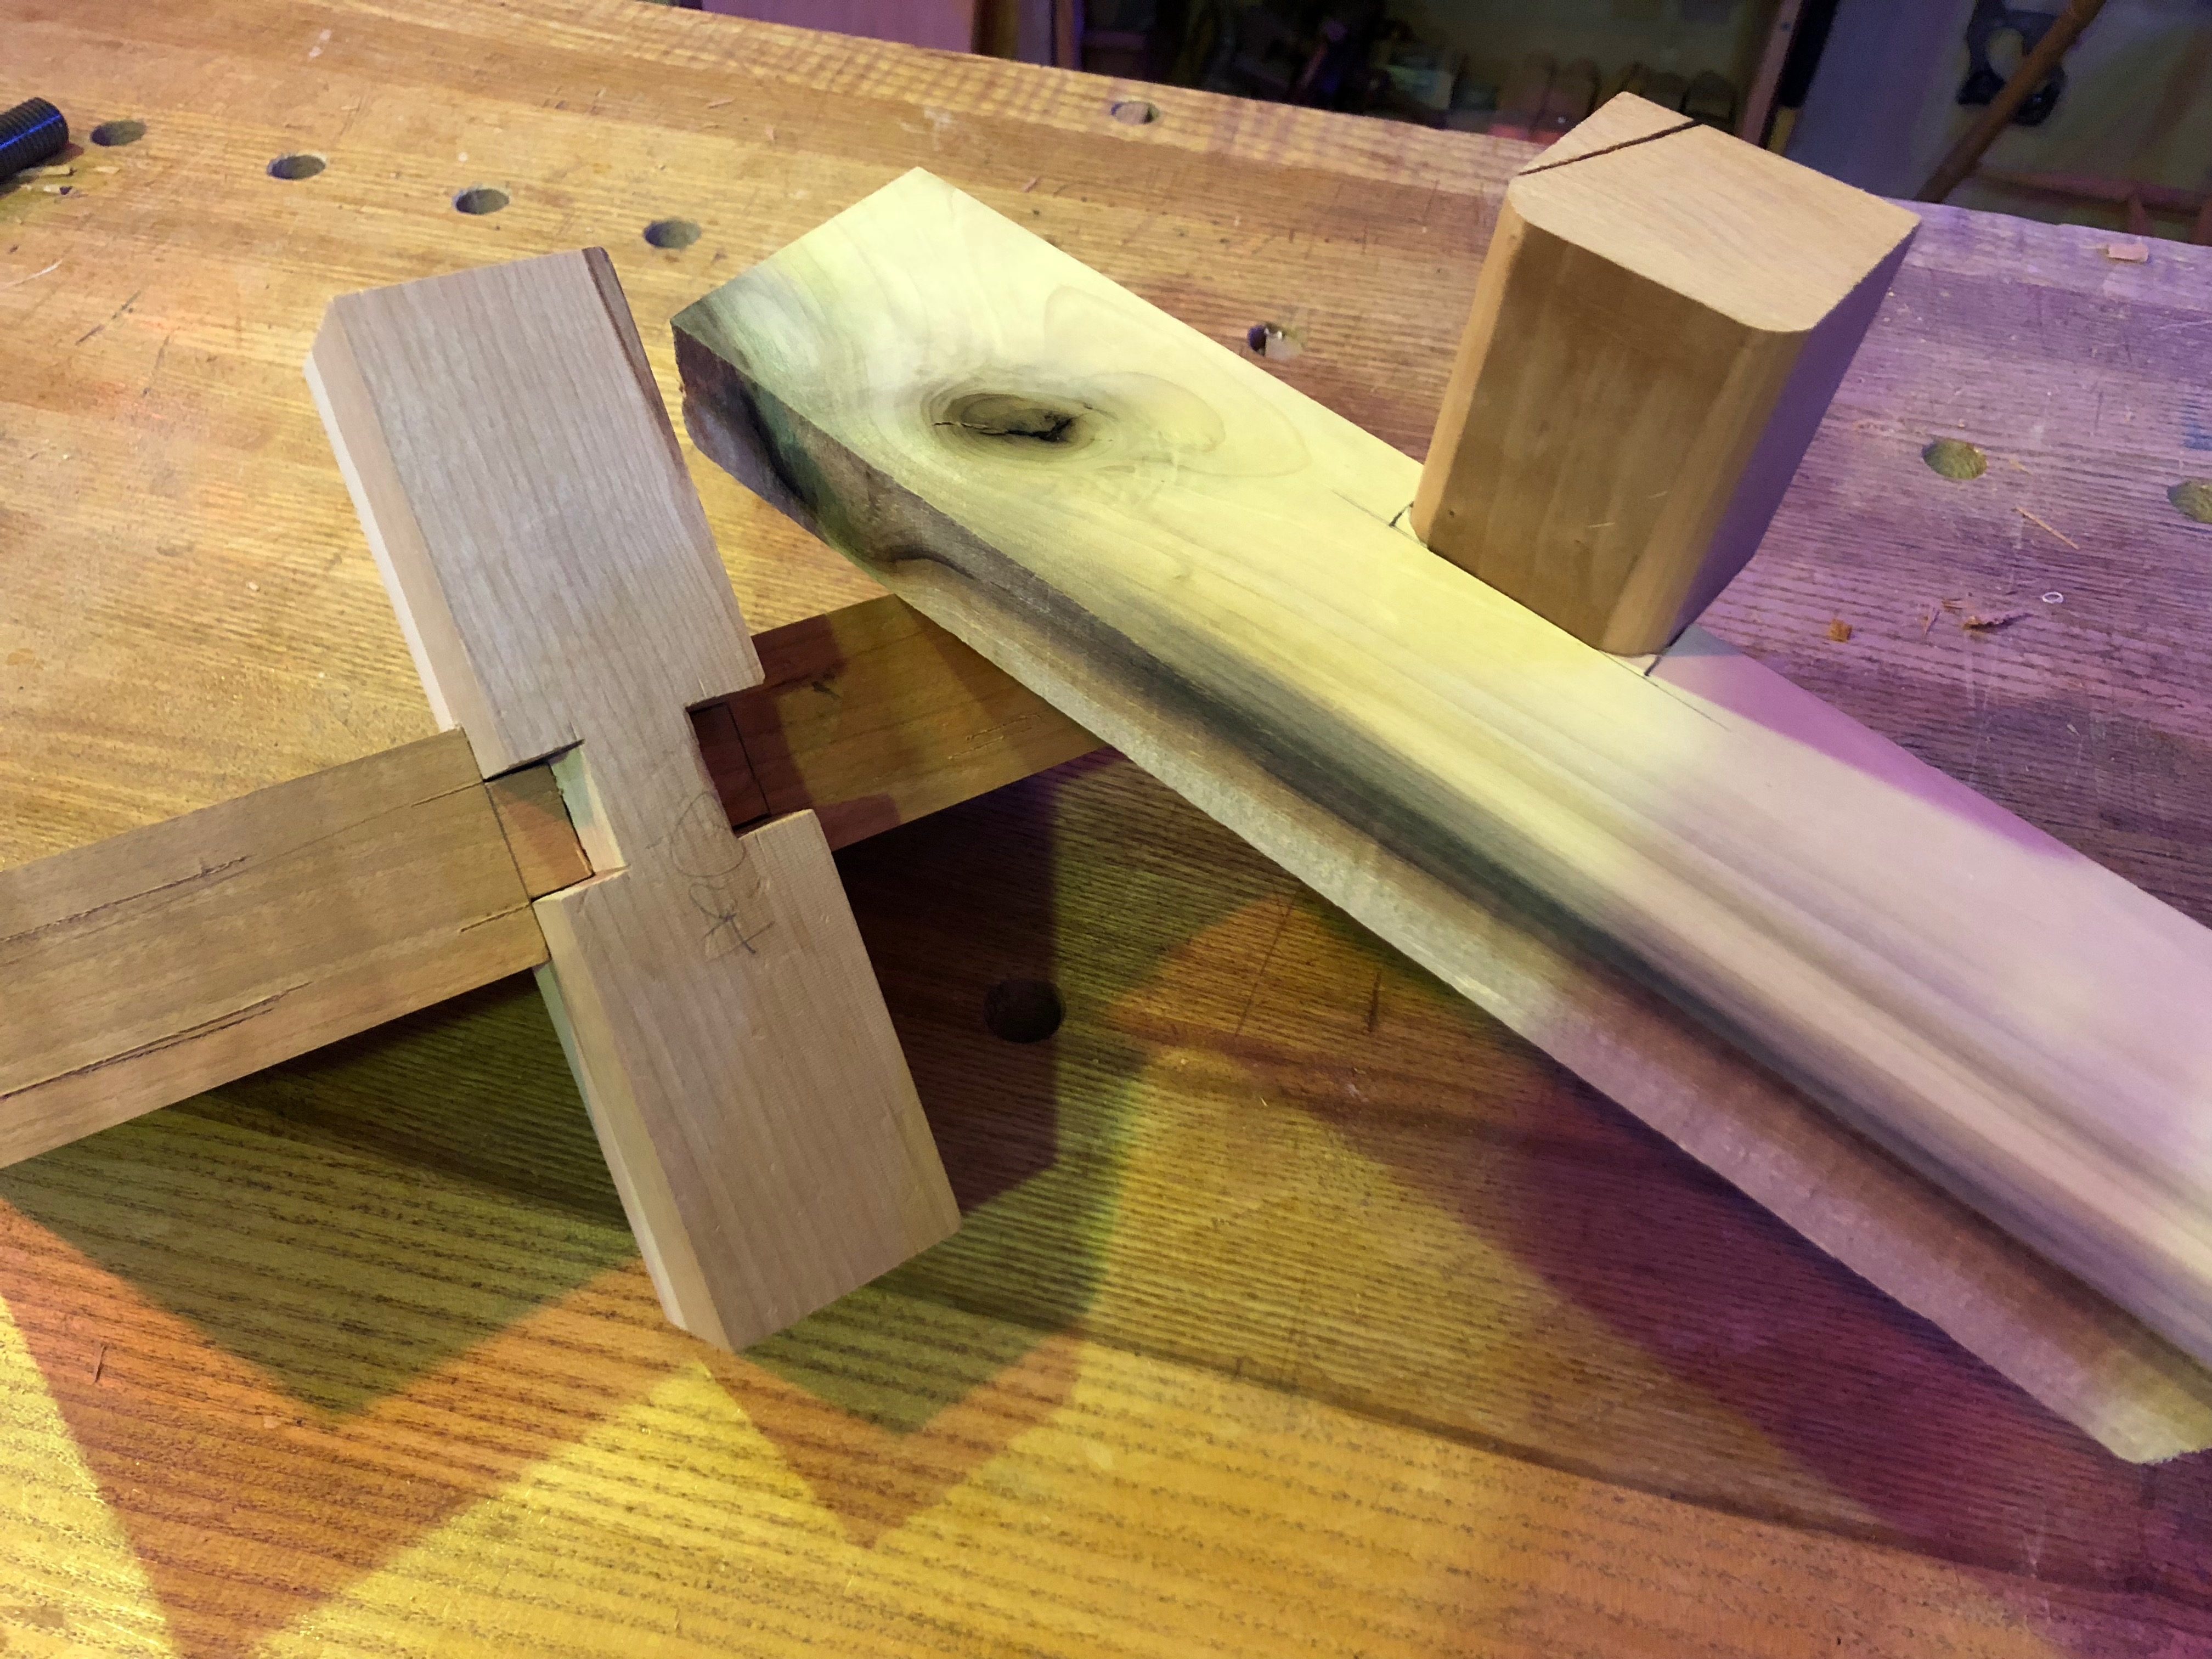 When thinking about how to cut the Maloof joint by hand you need to step back and examine it for what it really is. Its a notch that has rabbets cut on opposite faces. The leg part of the joint is 3 dados. Suddenly this iconic joint becomes a lot easier. The cut a notch in the seat, we saw out the extents and fret saw or chop out the waste in between just like a dado or dovetail pin. The rabbets are blind so a bit more complicated, but really almost identical to a hinge mortise. Finally the leg dados are just sawing the extents and chopping and router planing to depth.
But as with any complex joint, the actual cutting of it is a minor aspect. In fact the success of the cutting is based upon strong layout. So I spend a fair amount of time in this demonstration laying out both parts of the joint and taking care to use dividers to transfer dimensions instead of relying upon actual measurements. Still I think some efficiency could be added into this process and that will come with time as I cut a few more of these.
On the whole, whatever your feelings for this joint, it is a great sawing and chiseling exercise.
More How to Joinery
Some of the other popular joinery suggestions I received were for the Rising Dovetail and the Blind Mitered Dovetail. Both of these I have cut in demonstrations for my Apprenticeship students at The Hand Tool School. So I have pulled these lessons from the vault and made them available for individual purchase.