The Morse Taper in Woodwork?
Its no secret I have been playing with foot powered lathes in the last few years. I have been fortunate to be able to try out several designs based on vintage models as well as a few with modern touches. When I set out to build my pole lathe and now as I start to mill lumber for my flywheel lathe I am leaning towards the modern adaptation side. I already have several modern accessories from my electric lathe experience and I don’t want those chucks, faceplates, and mandrels to be wasted. This brings me inevitably to the morse taper. In the lathe world and especially in the machinist world the morse taper is the “joint” of choice for swapping parts in and out at the head and tail stocks.
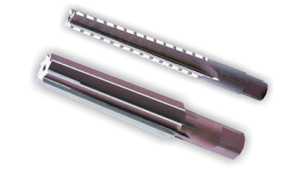
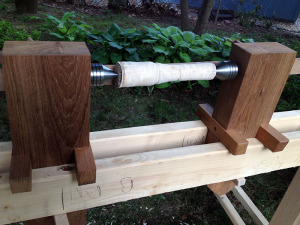
 I have incorporated modern live centers on my lathes and up until now I have drilled a stepped hole to receive the taper. In one instance I used a rasp to file away the arises and blend the steps into a taper, in another I left the steps and just wedged the live center in place. Both have held admirably well but no question that the rasped taper has a more solid feel to it. On a whim I hit the magical interwebs to see if a #2 morse tapered bit or reamer could be found. I have used reamers to make tapered mortises to receive tapered tenons on Windsor chairs and was really impressed with the sheer strength of the joint. The reamers on the Windsor side are usually in the 6 or 11 degree taper range and this is more severe than the morse taper. I could of course make my own morse reamer but I also found a 2 part set on eBay for $40 including shipping that makes my life even easier.
 To use I simply bore a hole to the smallest diameter of the taper then feed the reamer into the hole. The rough bit is self feeding with teeth set in a screw pattern that pulls it into the wood like the lead screw on an auger bit. It is “steerable” to some degree but like tapping threads you want to get it started as straight as you can at the outset. You follow it up with the finishing reamer with slices the wood with long blades and leaves a nice clean, perfectly tapered hole. Now when I slip my morse accessories into the hole I get that same positive registration from the manually tapered hole done with a rasp. The fit is so good that I had a bit of panic when I realized I forgot to drill a through hole in the poppet to allow me to knock out the live center from the back. So fortunately I learned this lesson on one of my ball bearing live centers and the step around the center gave me a point to lever against with a screw driver to break the locking taper and remove it.

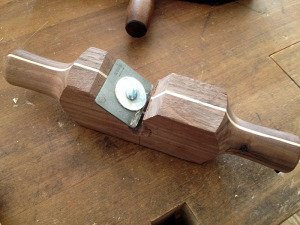
Tapering plane made by Elia Bizzarri used to create locking tapers on Windsor chair legs.
I have now experimented and drilled many holes and tapered them with the reamers in a variety of species from hard to soft and am getting similar results. Though I’m sure the softer woods will be more prone to deformation, the uniform pressure on the walls of the taper lead me to believe that it won’t be a big problem over time. This now has me thinking about what the possible applications for this could be in my day to day woodworking. I can envision many shop type projects and definitely more lathe projects, but I wonder how a morse taper might be used in a furniture piece. I would have to make a tapering plane that shaped the tenon at that morse angle but with the reamers I can very easily craft said plane just like one would use a hollow to make a matching round moulding plane. Hmmm, knock down furniture fitted with morse tapered joints? Think Schwarz Roorkhee Chair. I wonder what other trouble I can get into. Any ideas?
By the way, don’t leave your live centers in the lathe during a rainstorm. Rust ensues. Seems pretty obvious doesn’t it? Not my finest moment.
Your Turn
How else could I incorporate the morse taper into furniture or shop projects? Please share your thoughts or any experience you have with this in the comments below.


