Re-Learning Wood Turning at 1/10th Horsepower
I have been using a lathe for almost 10 years and have turned out thousands of items on it. I first bought a lathe to make small gifts for my business customers. Each year at Christmas I would create around 300 small gifts like pens, bowls, bottle stoppers and the like. And each year I had to raise the bar as my customers grew to anticipate these hand made gifts. So all my lathe experience really fell into simple and small gifts that essentially used small pieces of scrap wood. And while I integrated some beads and coves into the occasional piece much of it was pretty straight forward and just made up at the lathe.
It wasn’t until I started producing furniture parts at the lathe that I realized that I had been faking my way through turning. Instead of making up my shapes and not paying much attention to finished diameters and placement of these elements laterally, now I have to be more precise and be able to duplicate turnings. While I don’t really focus on exact reproductions of furniture, I do like to get close on some of the stuff I make so now suddenly I have a story stick and can’t shrug at a screw up and just re-shape the spindle. Suddenly after years and hours and hours of turning I had to learn how to turn. I went back to basics and worked on my tool handling for forming beads and coves cleanly and in a controlled manner. Then Easy Wood Tools came on the scene and I essentially ditched the traditional method for the idiot proof method of turning. Suddenly woodturning was fun again and I was able to create the shapes in my mind (or on my story stick) without screwing it up. In the back of my mind I kept telling myself that I would get back to the traditional tools eventually and learn to turn “for real”.
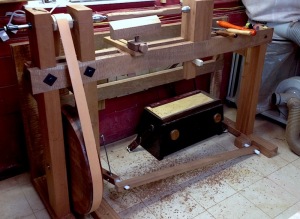
Enter my obsession for history and foot powered lathes. Now carbide tipped tools like Easy Wood Tools do work on a pole or flywheel lathe but in order to get crisp and clean shapes, a very sharp tool that cuts instead of scrapes is necessary. When the RPMs drop below 1000 or even 100 every cut counts and must be precise and efficient. This requires good technique and an intimate understand of how the tool cuts. Where is the bevel and the cutting edge? How do I move the tool along 3 axes to create the shape I want. How deep a cut can I take at once without causing the lathe to bog down or tearing of the wood. In other words, the tools need to act like an extension of your hand that you forget about in order to concentrate on other things like lathe speed and responding to the wood.That has yet to happen…
I needed to re-learn how to turn.
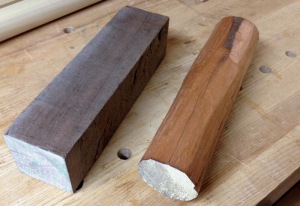
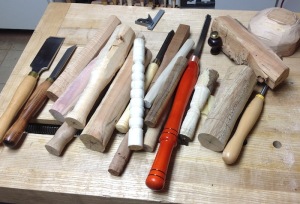
 So I went back to the beginning and tried to forget all my bad habits. I set my replaceable carbide tipped tools aside and focused on planing cuts, rolling beads, hollowing coves, and plunging v cuts. After rounding down and planing over 50 blanks in a few days I had gained the confidence and intimacy I needed with my roughing gouge and skew to forget about them and focus on my speed at both the flywheel and spring pole lathes. I learned a lot about blank preparation in order to make the turning easier and what kind of speeds were needed for roughing cuts and smoothing cuts. Basically the rounder you can get the blank before ever chucking it into the lathe the better your results. Thanks to my fancy new DrawSharp my draw knife and shave pony have gotten a healthy work out and I don’t try to stretch its sharpness while working with a increasingly dull tool. During this roughing I discovered that my work with bench plane and bench chisel had already given me the knowledge I needed to produce a smooth cylinder. I began to think of the spinning wood as something flat that had just been rolled up like a newspaper and I only needed to present my skew like I would a hand plane and let the wood roll underneath it. While I knew from many wood turning experts that a light touch was necessary it wasn’t until I connected the dots between a light, finger tip grip on a bench plane to the same feeling on the turning gouge or chisel. I kid you not when I say that suddenly a light bulb came on and the hours of planing at my workbench asserted themselves and told my hands what to do. There was nothing to re-learn, I just needed to connect it to what I already knew.
 Now armed with a stack of cylinders that made my shop look like a baseball bat factory I set forth to master the bead and cove. After rolling beads with hazy edges and inconsistent shapes and sizes I took a step back and thought about my bench work. What could that teach me? Up until now I had ignored the V cut because I never really used it at my electric lathe for anything but cutting a pommel transition. This was my essential mistake. I would never expect to make clean cut with a carving gouge nor chop a mortise without a relief cut. I would not expect to get a clean shoulder on a tenon or dovetail without first severing the fibers with a marking knife (another form of relief cut). A precisely positioned dovetail base line relies on the positive registration of placing the chisel in this knife line so why would I expect to do the same with a precisely placed cove on a spindle that also happens to be spinning?
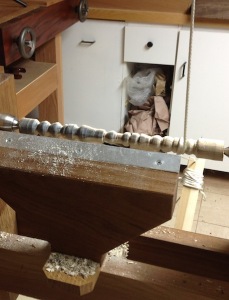
Now I was laying out my spindles in pencil then marking each line with the long point of the skew chisel. When I intended to cut beads I plunged deeper with the skew and attacked it from both sides like an axe felling a tree in order to create a V cut that provide a relief area to roll the skew or spindle gouge into while creating a bead. It was then that I realized the V cut is actually the bead prototype. At an electric lathe I could rely on the power of the motor to hog out wood but at lower speed and torque I could not do the same without grinding to a halt or pushing the tool too far and causing the edge to catch where it shouldn’t.
Now with the V already shaped it was just a matter of rounding with a very light cut and I could focus on twisting and sweeping the handle of the skew chisel or spindle gouge to trace the shape of the bead I intended to make. These relief cuts eliminated a variable and allowed me to focus on other aspects such as lathe speed. Here again bench work had already given me the skills I needed. When cutting a curve with a frame saw you must always be cutting turning a corner. If you turn the blade then cut the blade will bind and potentially break. To a lesser extent it will chatter and leave a choppy cut that requires a lot more clean up. By only turning the blade while making a cut the work goes smoother and more predictably. Wood turners don’t normally have to think this way because their wood is constantly in motion. However at the pole lathe I discovered that I needed to be conscious of when the wood was turning toward or away from me and either execute a complete pass of my intended shape during the downward push of the treadle or increase my speed to lessen the time of the spring back and increase the frequency of the cutting action. So just like a frame saw I had to make sure I was cutting as I rolled a bead. I did this mostly by increasing speed and making my initial cuts then actually slowing down for the final pass so that I could trace the shape of the entire element with my gouge in one cutting stroke to get a consistent and polished final shape.
 For hollowing out coves I had to change my approach and think of the V cut not as a relief but that knife line along my dovetail baseline or tenon shoulder. I still needed a relief cut in the middle so the spindle gouge had a place to go as I pointed the bevel. This time however I could rely upon the shape of the gouge to quickly scoop out a rough shape just by positioning the flue at 12 o’clock and using the finger tip grind to make the relief area. The difficulty came in starting the cove cut at the extents and rolling down into the valley. You have to roll the gouge onto its side and enter the wood at a precise point using only the tip of the tool with the bevel pointed in the direction and angle of the cut. Without the confidence to just plunge in the tip of the gouge assertively the tool will want to skate over the surface. Even if only a tiny bit this deviation will blur the lines of your cove and yield a sloppy result. Using the long point of the skew to “knife in” my cove perimeter I know had a shoulder that I could drop my gouge into to begin my cut. Once that foothold was established I only needed to ride the bevel down into the valley and feel the wood just like I would do with a carving gouge or bench chisel used bevel down. Here again, there was nothing to re-learn, I just had to apply my bench skills to the spinning wood.
On paper this all sounds easy but there were still a lot of stumbles and ugly looking beads and coves. As long as I came back to the sense memory of my bench work I was able to feel the bevel and execute the cuts. When the contact with the bevel started to waver I found that slightly increasing my speed with my foot was all that was needed to suck the bevel back to the wood. I use that word deliberately because it is the best way I can describe the sensation. In this way the infinite variable speed achievable by a foot powered lathe is probably its biggest asset. Furthermore, the instant speed up/down and start/stop of the pole lathe is an even bigger asset making the more “progressive” flywheel lathe seem the lesser tool. Believe me I was pretty shocked by that realization. I guess I shouldn’t be considering the pole lathe has been around for millennia now and is still in use today. It may even have more enthusiasts than the flywheel lathe if the Bodger forum is any indication.
Perhaps none of this is a revelation to the experienced turners out there but I tend to think that electric lathes can cover up our tool handling inadequacies by sheer speed and torque. For the pole lathe or treadle lathe user however, we have to go back to basics and start off right with rock solid technique. It just so happens that these techniques really aren’t different from flat work at the workbench. Its all wood, wedge, and edge after all.


