Shoulder Planes???
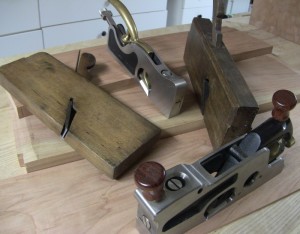 I have a couple of these guys made by modern makers. I have a vintage Stanley model too. I bought them early on in my conversion to hand tools because it seemed that all the pundits of the time were telling me I needed to have one. They got used though I admit rarely for actually planing tenon shoulders. Then they went in the tool cabinet and spent a lot more time there. Occasionally one would come out to address a problem after 3 or 4 other things were tried. Sometimes it fit the bill other times it was returned to the cabinet and another plane was pulled out to address the task. It was an unnoticed thing too and never a conscious decision. It wasn’t until I pulled my medium shoulder plane out of the cabinet (because it was in the way of another tool I needed) that I saw the thick layer of dust gathered on the plane. Like any good tool owner I was quick to wipe it away and oil the plane to prevent rust. Suddenly I stopped with rag suspended over the plane and wondered why I never use this plane or my other shoulder planes anymore. I suppose I can be mildly obsessive about my tools from time to time but the ones that get used rarely need to be oiled or have rust removed. They get plenty of rust prevention from the oils of my hands. So just the mere fact that dust build up had occurred in the first place was a red flag that my “essential” shoulder planes are maybe not that essential after all. Don’t get me wrong we had some good times but over time something has soured in our relationship and I’m wondering why.
As best I can tell the shoulder plane is a new invention. Usually these were called rabbet planes by the vintage makers, and even then many of these “vintage” models came out in early 20th century. Prior to this a rabbet plane was a wooden bodied plane that could have either a skewed or straight iron with a side escapement. By today’s standards of what a shoulder plane is I consider it to be a very different beast from a rabbet plane. The modern shoulder plane has its iron bedded at a low angle and bevel up and while it may look like a side escapement plane it is really just a whole in the body that allows the iron to extend all the to the edge of the sole. The shaving is not coaxed out one side or the other but rather rolls up and stays inside the body. This is because the shoulder plane is not meant to take a long shaving over the length of a case rabbet or run of moulding. The shoulder plane is meant to work on end grain of a tenon shoulder, hence the low angle bedding and no need for efficient shaving removal. The rabbet plane on the other hand is pretty much the opposite of all of the above with a bevel down iron bedded at a standard or higher angle and a definite bias on the escapement that will eject the shaving off to the side and thus prevent clogging while cutting long rabbets on moulding or whatever.
I therefore think it is fitting that the nomenclature has changed and the term “shoulder plane” came to be and important because I think it must be differentiated from the other planes where the blade extends right up to the corner of the sole. It is exactly the highly specific nature of the shoulder plane that has caused it to fall out of use in my shop. In some cases it has been replaced by another tool, in other cases my skill has improved to the point of not needing the assistance offered by the shoulder plane. Let’s look at how the shoulder plane can be used and why I no longer find it necessary. I really hope some of you will speak up in the comments about how you use the shoulder plane so I can see if I am missing something.
Trimming Tenon Shoulders
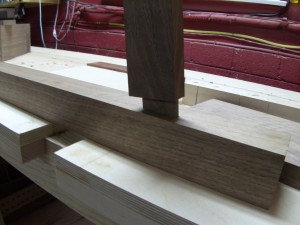 This is the task that the shoulder plane was designed for. The blade aspect is well suited for slicing end grain and creating shoulders that are all in the same plane and square to the tenon. I however found this process to be cumbersome because there was always the potential for horrific blowout on the corner of the board that forced me to work from both sides into the middle. Now I’m taking two separate passes and decreasing my chances of getting the shoulders into a single plane. Moreover the short end shoulder of the tenon don’t provide enough of a running surface for the plane to register against and either blowout or a tippy plane produced less than ideal results. For this task it is rare that you will want anything larger than the small shoulder plane as the added mass and wider sole will make the plane tippy on the narrow shoulder. So I found myself reaching for a chisel to pare the narrow shoulders inline with the long shoulders done with the shoulder plane. Then I started asking myself why not just use the chisel for the whole job and slightly undercut the shoulder to ensure a tight fit. So I replaced the shoulder plane for the chisel. Then I pretty much stopped using even the chisel as my sawing skills improved and the tenons fit right from the saw. So for this task I both replaced and “outgrew” it’s use.
Trimming Tenon/Half Lap/etc Cheeks
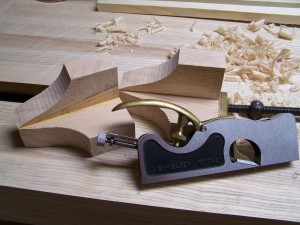
As an indication how little I use shoulder planes now this is the best image in my library of one. Cleaning glue from an inside corner is a good use.
End Grain Rabbets or Filisters
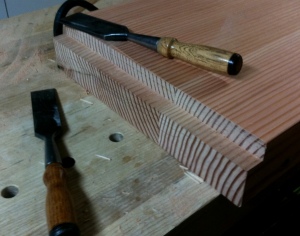 Think of a raised panel or perhaps the tenon of a breadboard end for this example. The width of sole issue is the same here as above so lets skip that for now. With a wider surface now the longer sole of a shoulder plane was much more useful and the added mass of a heavy plane was a great benefit. However the added resistance of a straight iron offsets that benefits of additional mass. The spelching issue is still present here too and usually additional measures needed to be taken to prevent minor spelching from becoming massive blowout. Usually a well placed saw cut or some paring with a chisel, or the attack from both ends approach mentioned above. Depending on how long this rabbet is the lack of escapement could be an annoyance that would cause clogging or the need to clear the shaving in mid pass, but this was rare. Working cross grain like this would also require that a shoulder be sawn in order to prevent horrible tearing on the surface thus marring your shoulder. In the end, that additional preventative measures required to do this work with a shoulder plane pushed me to a plane with a skewed blade. Even better a skew blade and a nicker iron so I could avoid the entire process of sawing in a shoulder. I have landed these days on vintage wooden skewed rabbet planes or a moving filister for tasks like this. I can quickly and cleanly remove wood without any of the preparation work required when using the shoulder plane. In really big work like the breadboard tenons on my Joinery bench, I wasted the bulk of the wood with a saw and chisel then refine the joint with a skewed wooden rabbet plane. These wooden planes have easily become some of my most used planes in the cabinet.
Long Rabbets
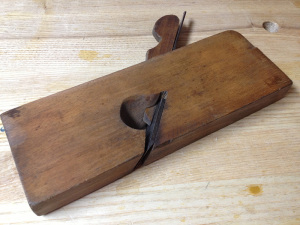 I could be wrong but I don’t think many people try to use a shoulder plane for this purpose. Imagine the back rabbet in a case into which you would fit a back panel. Just try this and you will quickly become annoyed with how quickly the shaving clogs the throat and how the lower bedding of the blade can lift and tear the wood easily. Usually a fenced plane is useful here that can be set and used to quickly run off the rabbets on all your case parts. Again the wooden rabbet plane is a good tool here because the taller profile can actually make cutting a square rabbet easier. You will find the fence isn’t as necessary as a good marking gauge line is all that is needed to start the plane and once the side wall is established the plane goes on autopilot.
There are probably more uses for a shoulder plane that I’m not thinking of here and I hope that some of you will speak up if there is something I haven’t considered. I have already decided to sell my medium shoulder plane and I’m on the fence about the large model. In many ways, I feel like I have outgrown this tool as the overwhelming reason it stays on the shelf is I have found the steps leading up to needing it have gotten more accurate thus eliminating the need to refine a cut. It has me examining other tools and wondering how useful they really are and why that usefulness may have changed. Of course one of the exciting (and maddening) things about woodworking are the seemingly endless number of variables from project to project. Perhaps I just haven’t found the project yet that demands I pull out that shoulder plane because nothing else will work just right.
Your Turn
Do you use a shoulder plane? How and why? Have you “outgrown” a tool by improving your skill elsewhere? I would love it if you share your experience in the comments below.


