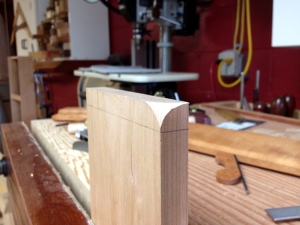
Sticking Mouldings at the Joinery Bench
This weekend I found yet another use for the Joinery bench. When I stick mouldings I always draw the profile on both ends of the board. Once I have laid out the rabbets I will connect the dots using a circle template or more often the actual soles of my planes. This is always a balancing act and consistent shapes can be hard to obtain. Then at the sticking board I go to work. I spend a lot of time bending over to sight along my board, or lifting up the piece to check my proximity to the line. This is part of the experience and I don’t know of a better way to do it when you are working with an 8 foot length of moulding.
When you are working on a smaller project with shorter runs of moulding or sticking a moulding directly onto a top or case edge, I discovered the Joinery bench triumphs again. Using the Moxon vise, I can securely clamp my board making layout on the ends a snap, then position the piece on edge and cut in my rabbet, chamfers, and hollows/rounds. I always cut the cross grain first (right after I hone the iron) so that any spelching can be cleaned up by sticking the long grain. This long grain edge has to be precise so you can match the profiles already created and get a consistent shape. The perfect miter line where the front and side profiles meet is the goal. One pass too many and you miss it then have to go back to the end and risk causing some spelching. I also need to rehone the iron as only the sharpest planes will cut across the grain cleanly. So a lot rides on getting that long grain profile just right.
With the project piece right up at chest level I can easily see where I need to remove more wood and where I need to leave alone. Reason number 3000 why I’m glad I built a joinery bench.


